Blog

Epoxy Resin River Tables – A DIY Guide

Blog

Epoxy Resin River Tables – A DIY Guide

by My Store Admin on Nov 18 2024
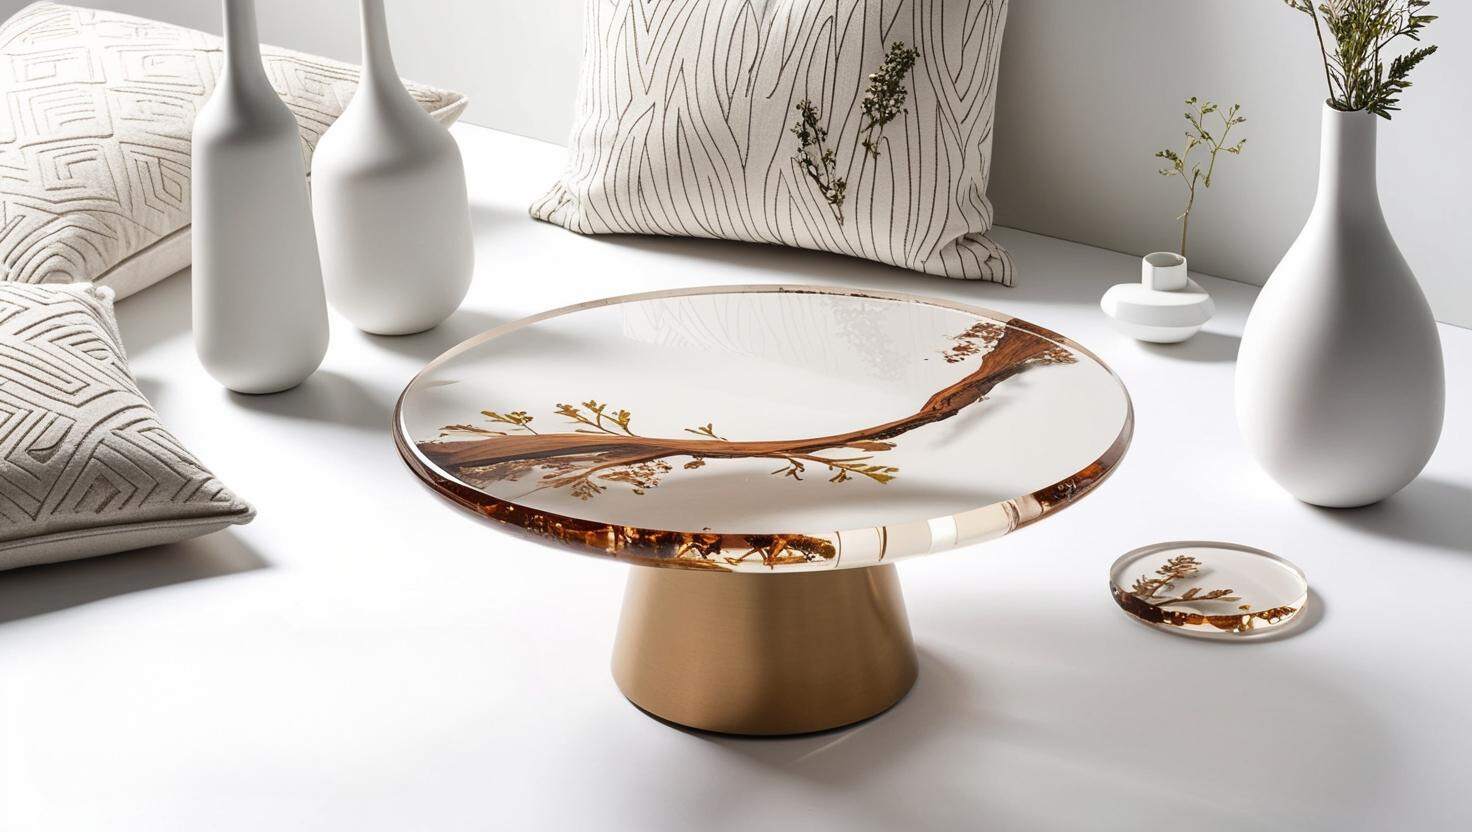
Epoxy Resin River Tables: Crafting Nature's Beauty in Your Home The Allure of Epoxy Resin River Tables Welcome to the enchanting world of epoxy resin river tables, where the beauty of nature meets the elegance of modern design. These stunning pieces are more than just furniture; they're a centerpiece, a conversation starter, and a reflection of personal style. The Basics of Epoxy Resin River Tables What is an Epoxy Resin River Table? An epoxy resin river table is a unique piece of furniture that combines wood and resin in a striking design. The 'river' is typically a strip of colored or clear epoxy resin that runs through the table, flanked by natural wood, creating a beautiful contrast. Materials You'll Need Wood slabs of your choice Epoxy resin and hardener Pigments or dyes for color Sealant and varnish for finishing Essential tools: Sanders, brushes, mixing cups Creating Your River Table Designing Your Table Selecting the right wood is crucial. Ideal choices include walnut, maple, or cherry for their durability and aesthetic appeal. While an ideal river table might be around 6 feet long and 3 feet wide, smaller dimensions are also popular for more compact spaces. For sourcing, consider local lumber yards, specialty woodworking stores, or even online marketplaces for pre-made slabs. Preparing the Wood Sand the wood to a smooth finish, paying special attention to the edges. Seal any cracks with a wood stabilizer to prevent resin leaks. Arrange the wood slabs on a leveled surface in your desired layout, ensuring the 'river' space is evenly distributed. Mixing and Pouring the Resin Choose a high-quality epoxy resin for clarity and durability. Mix the resin with your chosen pigment, following the manufacturer's instructions for ratios. Pour the resin slowly between the wood slabs, ensuring it's level and bubble-free. Curing and Finishing Touches Understanding Curing: Resin needs to transform from liquid to solid. This process, known as curing, is crucial for the table's durability.Precautions: Keep the area dust-free and maintain a consistent temperature. Avoid moving the table during curing.Post-Curing Steps: Once cured, sand the surface for a smooth finish. Apply a sealant or varnish for a glossy look. Tips and Tricks Avoiding Common Mistakes Keep the working area dust-free. Mix resin thoroughly to avoid a tacky finish. Monitor the curing process to prevent overheating. Advanced Techniques Embedded Objects: Embed stones, shells, or botanicals in the resin. Layered Pouring: Pour resin in layers, adding different colors or effects. LED Integration: Incorporate LED lighting for an illuminated effect. Conclusion Creating an epoxy resin river table is a journey of creativity and craftsmanship. With patience and practice, you can craft a piece that not only adds beauty to your home but also tells a story of your artistic journey. Discover and Learn with Enigma Artworks Transform your resin art dreams into reality with Balwin Studios. Our specialized workshops offer personalized guidance in creating epoxy resin river tables, blending artistic design with practical skills. Whether you're a beginner or looking to refine your techniques, our sessions provide the perfect environment for learning and creativity. Stay updated on our latest workshops and gain exclusive tips by following Balwin Studios on social media.
Mastering Resin Art Techniques

Blog

Mastering Resin Art Techniques

by My Store Admin on Nov 18 2024
Mastering Resin Art Techniques: Tips and Tricks for Stunning Creations Introduction The World of Resin Art: Endless Possibilities Explore the colorful and dynamic world of resin art, where the possibilities for creation are endless. Artists may experiment with color, texture, and shape in new and intriguing ways with this versatile material. Resin Art Basics Understanding Resin Resin art involves using epoxy resin, a two-component system consisting of resin and hardener. When mixed, they create a clear, durable material perfect for artistic expression. Essential Tools and Materials Epoxy Resin and Hardener: Choose from options like eco-friendly resin, UV-resistant types, or deep pour resin for thicker layers. Each type has specific properties and mixing ratios, so select based on your project needs. Color Pigments and Dyes: Available in liquid, powder, or paste forms. Liquid dyes are great for transparent effects, while powders and pastes offer intense colors and metallic finishes. Mixing Tools and Measuring Cups: Opt for graduated measuring cups for accuracy. Mixing tools can range from simple wooden sticks to electric mixers for larger batches. Heat Gun or Torch: Mini torches are suitable for small projects, while heat guns with variable temperature settings are better for larger works. Some artists also use butane torches for precise bubble removal. Protective Gear: Nitrile gloves are preferred for their durability. Masks should be rated for fume protection (like N95), and safety goggles should fully cover the eye area to prevent splashes. Advanced Resin Art Techniques Layering and Embedding Layering: Create depth by pouring resin in layers, allowing each to cure before adding the next.Embedding: Incorporate objects like flowers, glitter, or photos into layers for personalized art. Color Exploration Experiment with pigments and dyes. Learn how to blend colors for unique effects and how to create stunning swirls and patterns. Texturing Techniques Discover how to manipulate resin for different textures. Techniques include using a heat gun for wave effects or adding materials like sand for a tactile finish. Safety and Best Practices Resin art requires careful handling. Always work in a well-ventilated area, wear protective gear, and follow safety guidelines to ensure a safe and enjoyable experience. Tips for Beginners Starting Small Begin with smaller projects like coasters or jewelry to get a feel for the material and its behavior. Common Mistakes to Avoid Not measuring resin and hardener accurately Working in a dusty environment Rushing the curing process Conclusion Making art with resin is a creative and thrilling process. You're well on your way to producing gorgeous, unique items that highlight your artistic ability with these methods and advice. Elevate Your Artistry at Enigma Artworks Embark on a journey of artistic growth with Enigma Artworks. Our expert-led workshops delve deep into advanced resin art techniques, offering you the chance to enhance your skills and explore new creative horizons. Join our community of artists and enthusiasts, and take advantage of the wealth of knowledge and inspiration we provide. Follow Enigma Artworks for updates on workshops, tutorials, and more, and start mastering the art of resin today.
Transforming Spaces with Epoxy Resin Art

Blog

Transforming Spaces with Epoxy Resin Art

by My Store Admin on Nov 18 2024
Transforming Spaces with Epoxy Resin Art: From Functional to Fabulous Introduction  Revitalize Your Home with Epoxy Resin Art Discover how epoxy resin art can elevate your living space from ordinary to extraordinary. This guide will inspire you to create both functional and fabulous pieces that enhance your surroundings, offering a blend of beauty and practicality. The Versatility of Epoxy Resin in Home Decor Why Choose Epoxy Resin? "The Ideal Medium for Home Decor" Epoxy resin is not just a crafting medium; it's a transformative tool for home decorators. Its durability, clarity, and flexibility make it ideal for a variety of home decor projects, from functional items to stunning artworks. Popular Epoxy Resin Projects "Diverse Applications in Home Decor"Resin River Tables: Combine wood and resin for stunning tables that become the focal point of any room.Decorative Coasters: Create unique coasters that are both practical and beautiful, adding a personal touch to your living space.Wall Art: Use resin to make eye-catching pieces that brighten up any room with their vibrant colors and intricate designs.Functional Art: From lamp bases to clock faces, resin can add a touch of elegance to everyday items, blending art with utility. Creating Your Own Epoxy Resin Art Getting Started with the Basics "Laying the Groundwork for Resin Art Projects" Begin your resin art journey by understanding the basics. This section guides you through choosing the right resin and color scheme for your projects. Choosing the Right Resin: For home decor, look for a resin that's durable and has a high-gloss finish, suitable for both indoor and outdoor projects.Selecting Colors and Additives: Decide on your color scheme and consider additives like glitter, pigments, or even small objects to embed, adding depth and character to your pieces. Step-by-Step Guide to Your First Project "Creating Your First Resin Art Piece" Preparation: Gather your materials and prepare your workspace, ensuring a clean, dust-free environment.Mixing and Pouring: Mix the resin according to instructions and pour it into your mold or onto your surface, experimenting with colors and patterns.Curing: Allow ample time for the resin to cure, ensuring a strong and clear finish, and understand the importance of curing conditions for optimal results. Advanced Resin Art Techniques  Exploring Complex Resin Art Method "Taking Your Art to the Next Level" Delve into advanced resin art techniques that can add sophistication and complexity to your projects. Learn about layering, embedding, and creating special effects.Layering Techniques: Discover how to create layered resin art, adding dimension and depth to your pieces.Embedding Objects: Learn the art of embedding different objects within resin for personalized and unique designs. Incorporating Resin Art in Interior Design Resin Art as a Design Element "Enhancing Your Space with Resin Art"Understand how to incorporate resin art into your interior design scheme. This section covers how resin pieces can complement different styles and themes in your home. Matching Art with Decor: Tips on selecting resin art that harmonizes with your existing decor and color palette.Statement Pieces: Learn how to create or choose resin art pieces that serve as stunning focal points in a room. Resin Art for Outdoor Spaces Creating Durable Outdoor Art "Expanding Resin Art to Outdoor Areas"Epoxy resin art isn't just for indoors. Explore how to create resin art suitable for outdoor spaces, considering factors like weather resistance and sunlight exposure. Outdoor-Ready Resin: Choosing resins that withstand outdoor conditions for garden sculptures, patio decor, and more.UV Resistance: Ensuring your outdoor resin art maintains its color and integrity over time. Enigma Artworks: Your Guide to Resin Art Mastery At Enigma Artworks, we celebrate the beauty of resin art and provide the knowledge and skills to create it. Our workshops offer practical guides, expert tips, and hands-on experience for both beginners and seasoned artists. Join us to learn the intricacies of resin art and transform your living spaces with your own unique creations. Conclusion Epoxy resin art offers a unique way to enhance your living spaces, blending functionality with artistic expression. Whether you're crafting a statement piece for your living room or designing a functional item with an artistic twist, resin art opens up a world of possibilities.

Blog

Epoxy Resin Jewelry Making

by My Store Admin on Nov 18 2024
Epoxy Resin Jewelry Making: Crafting Unique Wearable Art Introduction  "Unleashing Creativity with Epoxy Resin Jewelry"Embark on a creative journey into the world of epoxy resin jewelry making. This guide will introduce you to the techniques and artistry of creating stunning, one-of-a-kind jewelry pieces, blending elegance with personal expression. Getting Started with Resin Jewelry  Essential Materials and Tools "Gathering Your Resin Jewelry Toolkit"Before beginning your resin jewelry journey, it's important to gather the right materials and tools. This section covers everything you need, from the best types of resin to the molds and embellishments that will bring your creations to life. Epoxy Resin and Hardener: A clear, high-quality epoxy resin is crucial for jewelry making. Look for non-yellowing formulas for long-lasting beauty.Molds: Silicone molds come in various shapes and sizes, perfect for creating diverse jewelry designs.Colorants: Explore a range of pigments, dyes, and metallic powders to add vibrant colors and effects to your pieces.Embellishments: Incorporate glitter, dried flowers, beads, or even small photographs to personalize your jewelry.Tools: Mixing cups, stir sticks, a drill for making holes in cured resin, and a polishing cloth are essential for a professional finish. Basic Techniques in Resin Jewelry Making Mixing and Pouring Resin "Mastering the Art of Resin Preparation"Learn the foundational skills of mixing and pouring resin, crucial steps in creating stunning jewelry. This section guides you through the process of preparing your resin, ensuring perfect consistency and clarity for your designs. Accurate Measuring: Use precise ratios for resin and hardener to ensure proper curing.Adding Color and Embellishments: Experiment with different colorants and decorative elements to enhance your designs.Pouring and Curing: Pour the mixed resin into molds and allow it to cure fully, following the manufacturer's recommended curing times. Designing Your Resin Jewelry Choosing Themes and Styles  "Finding Inspiration for Your Jewelry Designs"Selecting a theme or style for your resin jewelry can be a source of great inspiration. This section explores various approaches to designing your pieces, from nature-inspired motifs to modern abstract forms. Nature-Inspired Designs: Use elements like dried flowers or leaves to create organic, earthy jewelry pieces.Abstract and Modern: Bold colors and geometric shapes can give your jewelry a contemporary edge.Personalized Jewelry: Custom pieces with specific color schemes or embedded items make meaningful gifts or keepsakes. Advanced Techniques for Resin Jewelry Layering and Embedding  "Elevating Your Designs with Advanced Techniques"Discover how to add complexity and depth to your resin jewelry with advanced techniques like layering and embedding. This section provides step-by-step instructions for creating multi-dimensional effects and incorporating various elements into your resin. Layering for Depth: Create multi-dimensional effects by building layers of resin, adding depth and complexity to your designs.Embedding Objects: Skillfully embed small items within the resin for intricate and personalized jewelry. Finishing and Polishing Your Jewelry "Achieving a Professional Finish"The final touches can make all the difference in resin jewelry making. Learn how to properly sand, polish, and add hardware to your pieces, giving them a refined and elegant finish. Sanding and Polishing: Achieve a smooth, high-gloss finish on your resin jewelry for a professional look.Adding Hardware: Learn how to securely attach findings like earring hooks or pendant bails to your resin pieces. Troubleshooting Common Resin Jewelry Issues Overcoming Challenges in Resin Jewelry Making "Navigating Common Hurdles"Encounter common issues in resin jewelry making? This section offers practical solutions and tips to help you overcome these challenges and achieve flawless results. Avoiding Bubbles: Techniques for minimizing air bubbles, such as using a heat gun or torch and pouring resin slowly and carefully.Dealing with Sticky Resin: Solutions for handling resin that hasn't cured properly, including adjusting the resin-to-hardener ratio and ensuring optimal curing conditions. Innovative Resin Jewelry Projects Creative Project Ideas "Exploring New Horizons in Resin Jewelry"Looking for inspiration for your next resin jewelry project? This section provides a range of creative ideas and themes to spark your imagination, from seasonal designs to avant-garde concepts. Enigma Artworks: Enhancing Your Jewelry Making Skills Join our workshops at Enigma Artworks to explore the intricate world of resin jewelry making. Our experts provide hands-on training, from basic techniques to advanced design tips, helping you create exquisite pieces of wearable art. Conclusion  Epoxy resin jewelry making is a rewarding and creative endeavor. With these techniques and tips, you're well on your way to designing and crafting unique, beautiful jewelry pieces that reflect your personal style and creativity.
Advanced Color Mixing in Epoxy Resin Art

Blog

Advanced Color Mixing in Epoxy Resin Art

by My Store Admin on Nov 18 2024
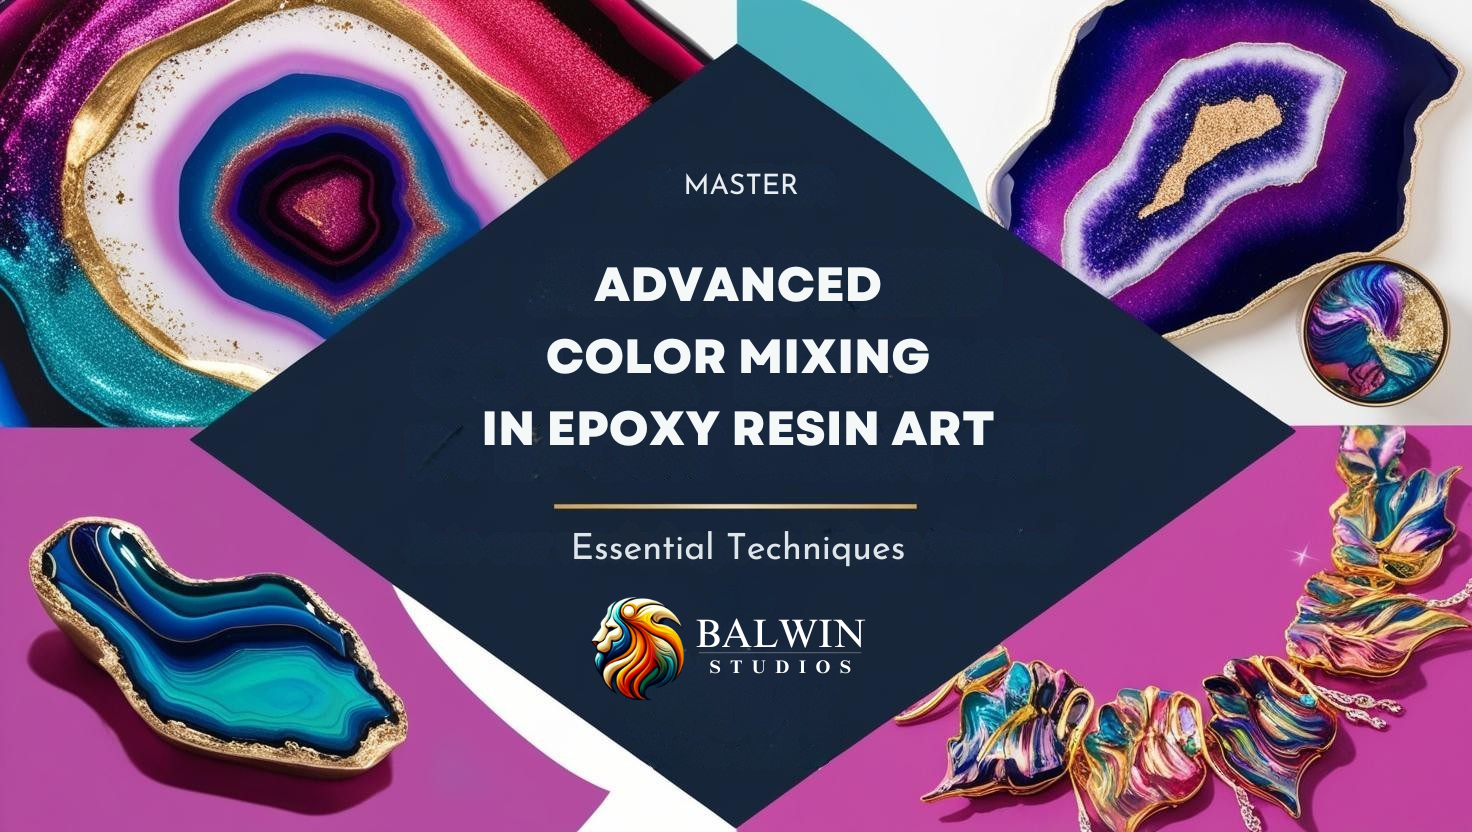
Advanced Color Mixing in Epoxy Resin Art: Essential Techniques Elevate Your Resin Art with Advanced Color Mixing Techniques Embark on a comprehensive journey to master the art of color mixing in epoxy resin. This extensive guide explores advanced techniques, offering insights into how different colors interact with various resin art projects, from river tables to intricate jewelry. Types of Colorants for Epoxy Resin Choosing the Right Colorants for Epoxy Resin Epoxy-Specific Pigments: Ideal for maintaining color clarity and consistency. Perfect for projects requiring solid, vibrant colors.Alcohol Inks: Known for creating vibrant, flowing effects and subtle transparencies. Excellent for achieving watercolor-like finishes or petri dish effects.Metallic Powders: Add shimmer and depth, especially effective in geode art and jewelry, creating a luxurious, sparkling finish. Color Mixing Techniques for Epoxy Resin Art Advanced Techniques for Mixing Colors in Resin Gradient Techniques: Mastering smooth transitions in layered projects, such as creating a gradient sky in resin wall art or ocean-themed pieces.Contrasting Colors: Utilizing contrasting hues for striking effects, like pairing bright colors with dark backgrounds in jewelry or abstract pieces.Temperature and Curing: Understanding how temperature variations can affect color blending and curing times, essential in large-scale projects like resin tables or artworks. Creating Mood and Atmosphere with Color in Resin Art Emotional Impact of Colors: Explore how different colors can evoke emotions and set the mood in a space, enhancing the artistic expression of your resin art.Color Schemes and Harmony: Learn about creating harmonious color schemes that can transform the aesthetic appeal of your resin art pieces. Innovative Color Mixing Projects in Resin Art Themed Creations: Ideas for themed resin art projects, like seasonal decor or nature-inspired pieces, and how to choose color palettes that complement the theme.Experimental Techniques: Encouraging experimentation with unconventional color combinations and additives to push the boundaries of traditional resin art. The Science Behind Color Mixing in Resin Art Chemical Reactions and Color Stability: Understanding how different colorants react with resin and affect the final outcome.Light and Color Perception: How light interacts with colored resin and influences the perception of depth and hue. Resin Art Color Mixing: Tips from the Pros Expert Advice on Color Blending: Insights from experienced resin artists on achieving perfect blends and effects.Troubleshooting Common Color Mixing Challenges: Solutions to common issues faced in resin color mixing, such as preventing muddy colors or uneven curing. Enigma Artworks: Your Gateway to Mastering Resin Art Join our workshops at Enigma Artworks for a hands-on experience in advanced color mixing. Learn from experts how to apply these techniques in various resin art projects, enhancing your skills and creativity. Conclusion  Advanced color mixing in epoxy resin art opens up a world of creative possibilities. With these insights and techniques, you're ready to experiment and bring your resin art projects to new heights of beauty and complexity.
The Ultimate Epoxy Resin Art Kit: Tools, Materials, and Techniques

Blog

The Ultimate Epoxy Resin Art Kit: Tools, Materials, and Techniques

by My Store Admin on Nov 18 2024
The Ultimate Epoxy Resin Art Kit Tools, Materials, and Techniques Introduction "Crafting Masterpieces with the Right Resin Art Kit"Embark on an exciting journey into the world of epoxy resin art. This extensive guide will equip you with knowledge about the essential tools, materials, and advanced techniques needed to create stunning, unique resin art pieces. Understanding Epoxy Resin Introduction to Resin Types "Selecting the Perfect Resin for Your Art"Epoxy resin comes in various types, each suited for different artistic applications. Learn about the properties of different resins, including viscosity, curing times, and finishes, to choose the best type for your art. Essential Tools and Materials for Resin Art Gathering Your Basic Supplies "Building the Foundation of Your Resin Art Kit"A well-equipped resin art kit is the first step to successful projects. This section details the fundamental tools and materials every resin artist should have. Epoxy Resin and Hardener: The core of your resin art, available in various formulas for different project types.Mixing Cups and Stir Sticks: Essential for accurately mixing resin and hardener.Protective Gear: Including gloves, respirator masks, and safety glasses for safe handling of resin. Molds and 3D Modeling for Resin Art Choosing and Creating Molds "The Art of Mold Selection and Creation"Molds play a crucial role in shaping your resin art. Explore the different types of molds available and learn about creating custom molds using 3D modeling and silicone molding techniques. Silicone Molds: Versatile and reusable, ideal for a variety of shapes and sizes.3D Printed Molds: Customizable options for unique designs, created using 3D modeling software and printers.DIY Silicone Molding: Techniques for creating your own molds from silicone, perfect for personalized projects. Colorants and Embellishments Enhancing Your Art with Colors and Textures "Diversifying Your Palette with Colorants"Colorants and embellishments add vibrancy and personality to your resin art. This section explores the various options available, from pigments and dyes to metallic powders. Pigments and Dyes: A range of options for adding color, including alcohol inks and epoxy-specific pigments.Metallic Powders and Glitters: To add shimmer and sparkle to your pieces.Natural Elements: Such as dried flowers or leaves for organic, nature-inspired designs. Advanced Tools and Equipment Elevating Your Art with Advanced Tools "Incorporating High-Tech Equipment in Resin Art"As you advance in resin art, incorporating high-tech tools can open up new creative possibilities. Discover how equipment like 3D printers and laser cutters can enhance your art. 3D Printers: For creating intricate molds or adding three-dimensional elements to your art.Laser Cutters: Ideal for precision cutting of materials like acrylics, used in combination with resin. Workspace Setup and Organization Creating an Ideal Artistic Environment "Designing Your Resin Art Studio"Setting up a dedicated workspace is key to efficient and enjoyable resin art creation. Learn how to organize and equip your space for both safety and creativity. Ventilation Solutions: Ensuring a well-ventilated workspace for safe resin handling.Storage Solutions: Ideas for organizing your tools and materials for easy access. Resin Art Techniques and Applications Exploring Diverse Resin Art Forms "Broadening Your Artistic Horizons"Resin art offers a wide range of techniques and applications. This section introduces various resin art forms, from jewelry making to large-scale artworks, providing inspiration for your next project. Jewelry Making: Techniques for creating unique resin jewelry pieces.Home Decor: Ideas for incorporating resin art into functional and decorative home items. Enigma Artworks: Your Partner in Resin Art Mastery At Enigma Artworks, we offer comprehensive workshops and resources to guide you through every aspect of resin art, from basic techniques to advanced equipment usage. Join us to expand your skills and explore the full potential of epoxy resin art. Conclusion Starting with the right tools and materials is key to successful epoxy resin art. This guide equips you with the knowledge and resources to begin your journey into the mesmerizing world of resin art, enabling you to create pieces that are both beautiful and uniquely yours.
Advanced Epoxy Resin Techniques

Blog

Advanced Epoxy Resin Techniques

by My Store Admin on Nov 18 2024
Advanced Epoxy Resin Techniques: Taking Your Art to the Next Level Introduction "Mastering the Art of Epoxy Resin"Embark on a journey to elevate your epoxy resin art with advanced techniques designed for experienced artists. This guide delves into complex methods, offering insights and inspiration to enhance your artistic expression and craftsmanship. Exploring Advanced Resin Techniques Introduction to Advanced Methods "Pushing the Boundaries of Resin Art"Advanced resin techniques offer a new realm of possibilities for creativity and innovation. This section introduces you to sophisticated methods that can transform your approach to resin art. Multi-Layered Pouring: Techniques for creating depth and intricate patterns through layered resin pours. This involves pouring resin in multiple layers, allowing each to partially or fully cure before adding the next. Use different types of resin pigments and additives for each layer. Ensure each layer is level and cured enough to support the next pour, experimenting with transparent and opaque layers for varied visual effects.Incorporating Mixed Media: Explore the integration of various materials like wood, metal, or fabric with resin for unique textural contrasts. This involves embedding or attaching different materials into resin. Properly prepare surfaces (sanding or priming) for better adhesion and consider the expansion rates of different materials to prevent cracking. Advanced Color Techniques in Resin Art Color Manipulation and Effects "Experimenting with Color Dynamics"Advanced color techniques in resin art involve more than just mixing hues. This section covers how to manipulate color for stunning visual effects and mood setting in your pieces. Thermal Color-Changing Resin: Utilizing temperature-sensitive pigments for dynamic color shifts. Test pigment behavior at various temperatures before final application and mix pigments thoroughly to ensure consistent color change.Creating Optical Illusions: Techniques for using color and transparency to create three-dimensional illusions in flat resin pieces. Use transparency to create depth and layering for a 3D effect, experimenting with color placement and viewing angles. Utilizing Resin in Large-Scale Projects Scaling Up Your Resin Art "Challenges and Techniques for Larger Projects"Large-scale resin projects present unique challenges and opportunities. Discover tips and strategies for managing big projects, from wall art to furniture, ensuring consistency and quality. Working with Large Molds: Techniques for creating and handling large-scale molds for furniture or wall art. Ensure molds are sturdy and leak-proof. Consider resin's weight and curing time for large pours.Managing Curing Times and Exothermic Reactions: Balancing the chemical aspects of resin work on a larger scale to prevent cracking or warping. Monitor the exothermic reaction, especially in thick pours, and use resins formulated for larger projects with slower curing times. Innovative Resin Casting Techniques Advanced Casting Methods "Exploring New Frontiers in Resin Casting"Push the boundaries of traditional resin casting with innovative techniques. This section explores complex casting methods, including hollow casting and incorporating moving elements. Hollow Casting: Creating lightweight, hollow structures with resin, ideal for large or wearable pieces. Ensure even application of resin around the core and carefully remove the inner core material after curing.Embedding Kinetic Elements: Techniques for embedding elements that move or change over time within your resin art. Securely embed elements so they remain functional after resin cures and test the movement or change mechanism before final embedding. Enigma Artworks: Enhancing Your Resin Art Skills Creating an Ideal Artistic Environment At Enigma Artworks, we provide advanced workshops and resources for artists looking to take their resin art to the next level. Join us to explore these advanced techniques, guided by experienced professionals, and connect with a community of like-minded artists. Conclusion Advanced epoxy resin techniques open up a world of artistic possibilities, allowing you to create more complex, dynamic, and intricate works of art. With these methods, you can elevate your resin art, pushing the boundaries of creativity and craftsmanship.
Incorporating Nature into Epoxy Resin Art

Blog

Incorporating Nature into Epoxy Resin Art

by My Store Admin on Nov 18 2024
Incorporating Nature into Epoxy Resin Art: A Guide to Using Natural Elements Introduction "Blending the Beauty of Nature with Epoxy Resin Art"Discover the captivating world of epoxy resin art, where the beauty of nature meets the versatility of resin. This guide delves into the intricate process of embedding natural elements, offering detailed insights for creating stunning, nature-inspired resin pieces. Preparing Natural Elements for Resin Embedding "Ensuring the Best Outcome with Proper Preparation"Before diving into the creative process, it's crucial to properly prepare your natural elements. This preparation ensures their beauty is perfectly preserved and they seamlessly integrate into your resin art. Drying Flowers and Leaves "Preserving the Natural Beauty"Techniques: Explore methods like air drying, pressing, or using desiccants like silica gel. Each method has its unique effect on the appearance of the flowers and leaves in the resin.Considerations: Select flowers and leaves based on how well they retain color and shape when dried. Experiment with different species to find the best fit for your art style. Selecting Stones and Shells: Criteria: Focus on size, color, and texture when selecting stones and shells. These elements should complement the resin's transparency and the overall design of your piece.Compatibility: Examine the stones or shells for any characteristics that might affect their suitability for resin embedding, such as porosity or tendency to react with resin. Preparing Embeddings "Ensuring Compatibility with Resin"Cleaning: Emphasize the importance of thoroughly cleaning natural elements to remove any impurities that could affect the resin's clarity.Priming: Discuss the benefits of priming certain elements, especially those that are porous or might react with the resin, to ensure a smooth embedding process. Embedding Techniques in Resin Art "Mastering the Art of Embedding for Stunning Results"Embedding natural elements in resin is an art form that requires both creativity and technical skill. This section explores various techniques to achieve different aesthetic effects and ensure the longevity of your art. Layering for Depth "Creating Dimension in Resin Art"Process: Delve into the step-by-step process of layering resin and natural elements to create depth. Discuss how to plan your layers for the most impactful visual effect.Visual Effect: Explain how layering can create illusions of depth and dimension, making your resin art more dynamic and engaging. Arranging Elements "Composing Natural Artworks"Balance and Composition: Offer tips on achieving a harmonious balance in your compositions, considering aspects like color, form, and negative space.Securing Elements: Discuss methods to secure elements in place during the initial pour, ensuring they remain in the desired position as the resin cures. Avoiding Air Bubbles "Achieving a Flawless Finish"Technique: Provide detailed instructions on using heat tools like heat guns or torches to remove air bubbles, including safety precautions and techniques to avoid damaging the natural elements.Pre-Pour Tips: Share tips on reducing the likelihood of air bubbles forming, such as warming the resin and hardener and pouring techniques that minimize air entrapment. Designing with Nature in Mind "Creating Art that Reflects the Beauty of the Natural World"Designing with natural elements requires a thoughtful approach that respects and highlights the inherent beauty of these materials. This section covers various design concepts and themes inspired by nature. Seasonal Themes "Capturing the Essence of Seasons"Color Schemes: Explore how to use color palettes that reflect different seasons, creating resin art that resonates with the time of year.Seasonal Elements: Provide examples of how to incorporate seasonal natural materials to create art that tells a story or evokes a specific mood. Ecosystem Representations "Bringing Diverse Habitats to Life"Design Approach: Discuss how to conceptualize and execute designs that represent various ecosystems, from lush forests to serene beaches.Layering: Explain how to use layering to mimic the complexity of natural habitats, adding authenticity and depth to your resin art. Advanced Techniques for Natural Resin Art "Pushing the Boundaries of Resin Art with Advanced Techniques"For experienced resin artists, this section explores advanced techniques that offer new challenges and opportunities to create truly unique and intricate pieces. Incorporating Large or Irregular Elements "Working with Bold Natural Features"Handling Large Elements: Discuss strategies for working with larger natural items, considering factors like weight distribution and resin curing.Balancing the Piece: Offer advice on achieving visual and physical balance when incorporating large or irregularly shaped natural elements. Creating Interactive Pieces "Adding Movement and Interaction"Kinetic Elements: Explore the concept of creating resin art that incorporates movable elements, adding an interactive dimension to your work.Design Considerations: Discuss the technical aspects of designing interactive pieces, ensuring the functionality and durability of the moving parts. Preserving Nature's Beauty in Resin "Ensuring the Longevity and Preservation of Your Natural Resin Art"Creating resin art with natural elements is not just about the aesthetic appeal; it's also about preserving these elements so that they maintain their beauty over time. This section covers important considerations for the longevity and care of your resin art. UV Protection "Safeguarding Your Art from Fading"UV-Resistant Resin: Highlight the importance of using UV-resistant resin to protect both the resin and the embedded natural elements from fading and yellowing.Additional Coatings: Discuss the option of applying additional UV-resistant coatings for added protection, especially for pieces that will be exposed to sunlight. Care and Cleaning: "Maintaining the Longevity of Your Resin Art"Cleaning Tips: Provide guidance on the best practices for cleaning and caring for resin art, ensuring it remains pristine and beautiful for years to come.Long-Term Care: Share tips on how to store and display resin art to prevent damage and preserve its quality. Enigma Artworks: "Fostering Your Connection with Nature through Art"Join us at Enigma Artworks, where we celebrate the fusion of nature and art. Our workshops and resources are designed to guide you through the fascinating process of incorporating natural elements into resin art, helping you create pieces that are not only visually stunning but also deeply connected to the natural world. Conclusion Incorporating nature into epoxy resin art offers a unique opportunity to blend the organic beauty of the natural world with the versatility and depth of resin. This artistic endeavor allows for endless creativity and personal expression, resulting in pieces that are not only visually stunning but also rich in meaning and connection to nature. Whether you are a seasoned artist or a beginner, the techniques and ideas shared in this guide will inspire you to explore new possibilities and create resin art that truly stands out. By embracing the beauty of natural elements and mastering the art of embedding them in resin, you can transform ordinary materials into extraordinary works of art.
Why Handmade Polymer Clay Jewelry

Blog

Why Handmade Polymer Clay Jewelry

by My Store Admin on Nov 18 2024
Discover the Beauty of Handmade Polymer Clay Jewelry: Unique, Sustainable, and Perfect for Any Occasion In the world of jewelry, there’s something special about owning a handmade piece. Handmade polymer clay jewelry stands out with its vibrant colors, intricate designs, and lightweight feel, making it a popular choice for individuals seeking something unique and eco-friendly. Whether you're looking for the perfect statement earrings, a personalized necklace, or a thoughtful gift, polymer clay jewelry offers endless possibilities. In this guide, we’ll explore everything you need to know about handmade polymer clay jewelry and why it deserves a spot in your collection. Why Choose Handmade Polymer Clay Jewelry? The Art Behind Every Piece Handmade polymer clay jewelry isn’t just another fashion accessory; it’s a form of wearable art. Each piece is crafted by skilled artisans, often one at a time, ensuring that no two pieces are exactly alike. This meticulous process allows for a wide range of colors, patterns, and textures, giving you a piece that truly reflects your personal style. Eco-Friendly and Sustainable FashionWith growing awareness around environmental impact, handmade polymer clay jewelry offers a sustainable alternative to mass-produced accessories. Polymer clay is durable, reusable, and long-lasting, reducing the need for frequent replacements. Plus, since each piece is handmade, it reduces the carbon footprint associated with factory-made products. Lightweight and Comfortable to WearUnlike metals and other heavy materials, polymer clay jewelry is incredibly lightweight, making it perfect for all-day wear. You can enjoy bold statement earrings or intricate designs without the discomfort of heavy jewelry dragging you down. Types of Handmade Polymer Clay Jewelry Earrings, Necklaces, Bracelets, and MoreHandmade polymer clay jewelry comes in a variety of styles, from trendy dangle earrings to elegant necklaces. Whether you prefer minimalist designs or bold, colorful patterns, there’s something for every taste. Popular styles include: Polymer Clay Earrings : Statement pieces, studs, dangle earrings, and hoops, perfect for both casual and formal occasions. Polymer Clay Necklaces : Personalized pendants, bold necklaces, and delicate chains to suit any style. Polymer Clay Bracelets : Unique bangles and cuffs that add flair to any outfit. Customization and PersonalizationOne of the biggest appeals of handmade polymer clay jewelry is its customizability. Many artisans offer personalized designs, whether it’s choosing your own color combinations, patterns, or even adding custom shapes and initials. This makes polymer clay jewelry an excellent gift option for birthdays, weddings, and other special occasions. How to Care for Your Polymer Clay Jewelry Simple Tips for Long-Lasting WearTo ensure your handmade polymer clay jewelry lasts for years to come, follow these easy care tips: Store Separately: Keep your jewelry in a cool, dry place away from direct sunlight. Storing it in a jewelry box or a soft pouch prevents scratches and damage. Avoid Water: While polymer clay is water-resistant, it’s best to avoid prolonged exposure to water to maintain the piece’s vibrancy. Clean Gently: Use a soft cloth to wipe away any dirt or oils. Avoid using harsh chemicals, as they can damage the jewelry. Handle with Care: Polymer clay is strong but can break if dropped on a hard surface, so always handle your jewelry with care. Why Polymer Clay Jewelry Makes the Perfect Gift Unique and Thoughtful Gifts for Any OccasionHandmade polymer clay jewelry makes for the perfect gift, whether it’s for a friend, a family member, or yourself! Since each piece is unique and customizable, it shows thoughtfulness and attention to detail that mass-produced items can’t match. Popular gift ideas include: Personalized Initial Necklaces : A timeless gift with a personal touch. Custom Color Earrings : Perfect for someone who loves bold, vibrant accessories. Holiday-Themed Jewelry : Give the gift of festive earrings or pendants to celebrate special occasions. Eco-Friendly and Ethical Fashion Support Small Businesses and Sustainable PracticesBy purchasing handmade polymer clay jewelry, you are supporting small businesses and artisans who focus on sustainability and ethical craftsmanship. These artists often use minimal packaging and eco-friendly materials, making polymer clay jewelry an environmentally conscious choice. How to Style Polymer Clay Jewelry Perfect for Any OutfitPolymer clay jewelry is versatile and can be styled to suit any look. Here are some popular ways to wear it: Boho Chic : Pair dangle polymer clay earrings with flowy dresses or skirts for an earthy, boho look. Minimalist : For a more understated style, opt for stud earrings or delicate pendants in neutral tones. Bold and Colorful : Add a pop of color to your everyday outfits with bright and vibrant polymer clay pieces. Is Polymer Clay Jewelry Safe to Wear and Safe for Kids? Hypoallergenic and Safe for All AgesPolymer clay jewelry is generally considered safe for both adults and children. It is non-toxic and does not cause allergic reactions, making it ideal for people with sensitive skin. Most polymer clay jewelry uses hypoallergenic metals like stainless steel for earring hooks, ensuring they are gentle on the skin. However, make sure to check that the jewelry uses safe, high-quality components, especially when buying for young children.For kids, polymer clay jewelry is a fun, safe accessory to wear, but supervision is recommended for younger children, as small parts can pose a choking hazard. Occasions for Wearing Polymer Clay Jewelry Versatile Jewelry for Every EventPolymer clay jewelry is incredibly versatile and can be worn for various occasions, from casual outings to formal events. Whether you need a pop of color for everyday wear or a statement piece for a special occasion, there’s always a perfect polymer clay accessory to match. Here are a few occasions where polymer clay jewelry shines: Everyday Wear: Lightweight and comfortable, making it perfect for day-to-day wear. Special Events: Bold, eye-catching designs are ideal for weddings, parties, and celebrations. Gifting: Personalized pieces make for thoughtful gifts during holidays, birthdays, and anniversaries. How to Care for Your Polymer Clay Jewelry Simple Tips for Long-Lasting WearTo ensure your handmade polymer clay jewelry lasts for years to come, follow these easy care tips: Wipe gently with a soft cloth. Avoid water and harsh chemicals. Store separately in a cool, dry box to avoid scratches and damage. Handle with care to prevent breakage. Use nail polish remover to wipe away stains. Where to Buy Handmade Polymer Clay Jewelry Discover Unique Pieces at Balwin StudiosAt Balwin Studios, we pride ourselves on crafting high-quality, handmade polymer clay jewelry that reflects individuality and style. Each piece is carefully designed with attention to detail and sustainability in mind. Explore our latest collection of earrings, necklaces, and bracelets in our online shop, or contact us for custom orders. Etsy, Amazon, and Local ArtisansYou can also find stunning polymer clay jewelry from various artisans on platforms like Etsy and Amazon. Shopping from small businesses ensures that you’re supporting local makers and sustainable fashion practices. Why Choose Balwin Studios for Polymer Clay Jewelry? Handmade with Love and CreativityAt Balwin Studios, every piece of jewelry is a labor of love. From the initial design to the final product, we ensure that our creations reflect the highest quality craftsmanship. With customizable options and attention to detail, you’re sure to find a piece that speaks to your style. Affordable and SustainableOur jewelry is not only affordable but also eco-friendly. We believe that style and sustainability can go hand-in-hand, and we strive to make that a reality with every piece we create. Conclusion Explore the World of Handmade Polymer Clay Jewelry Today!Whether you’re looking to make a fashion statement, find the perfect gift, or simply add something special to your jewelry collection, handmade polymer clay jewelry offers endless possibilities. Shop at Balwin Studios to find your next favorite piece and join the movement toward sustainable, artistic fashion.
Must-Have Tools for Polymer Clay Artists

Blog

Must-Have Tools for Polymer Clay Artists

by My Store Admin on Nov 18 2024
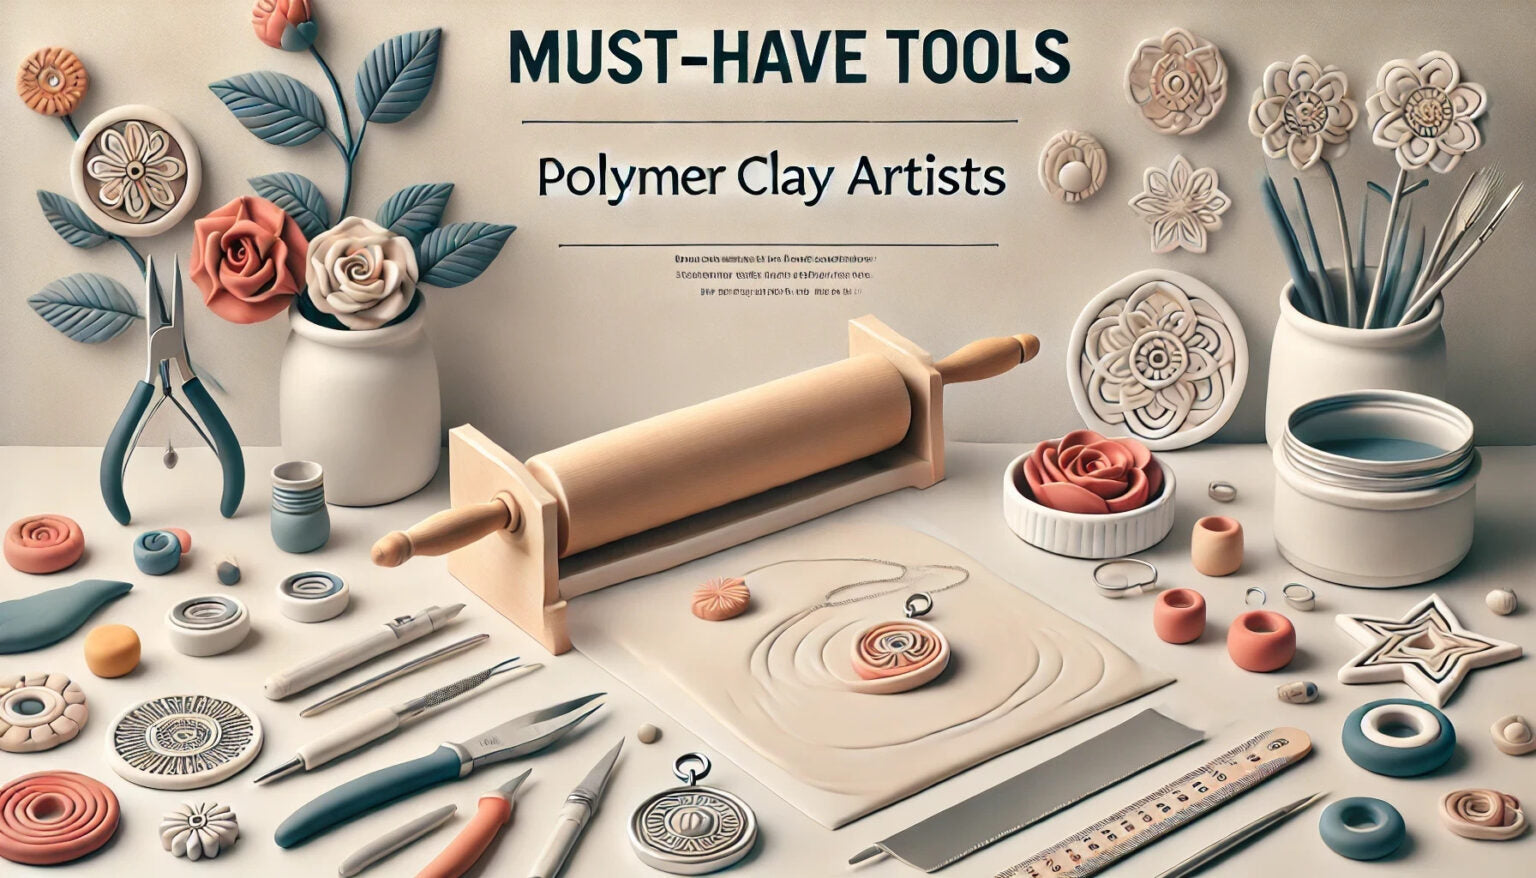
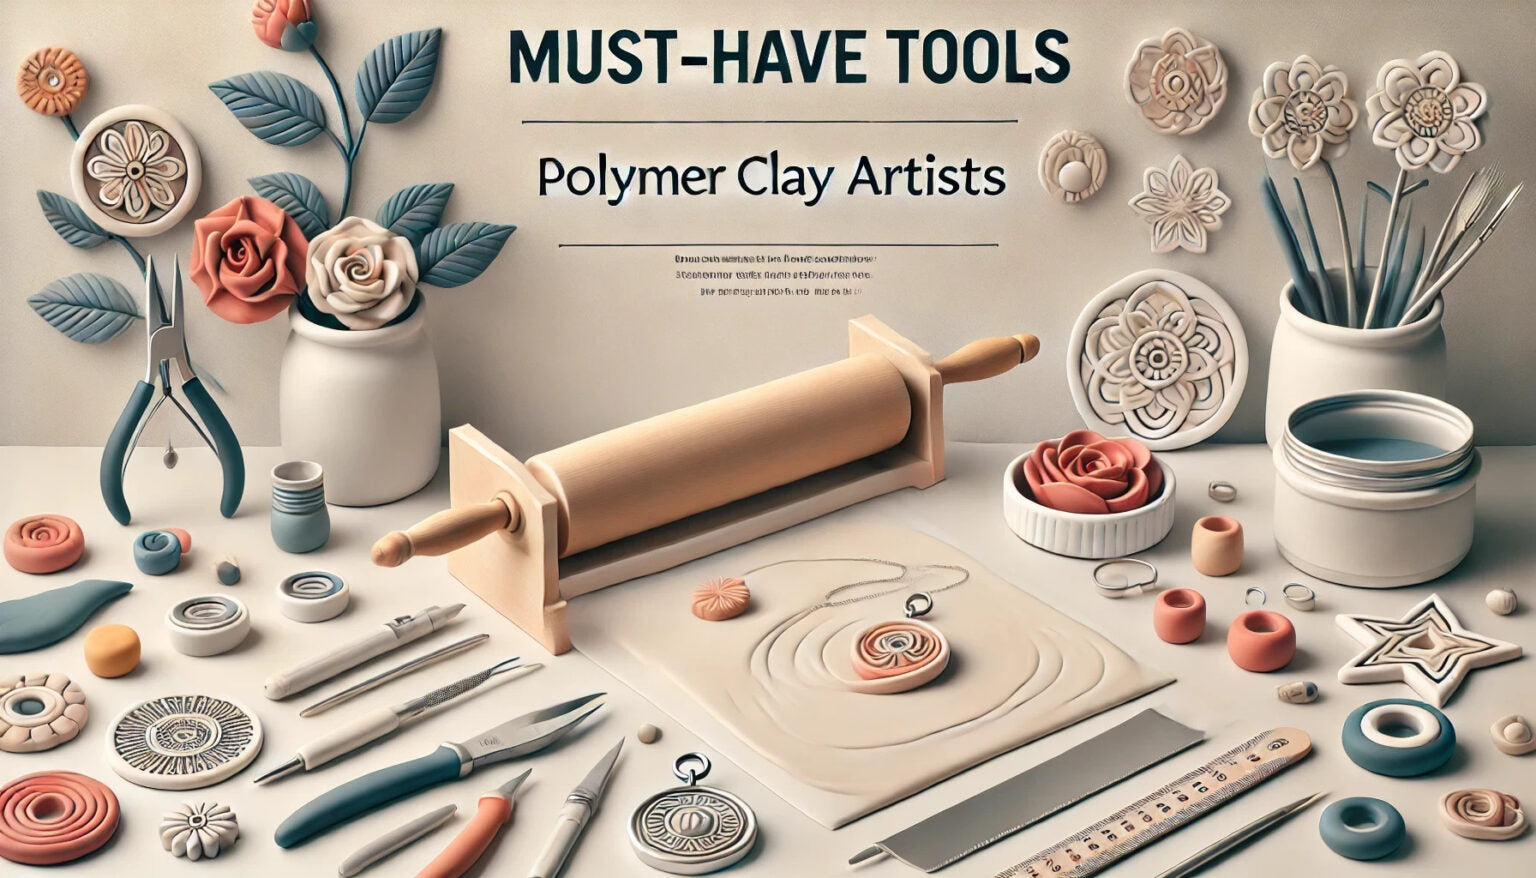
Embark on a journey of creativity with our comprehensive guide to the essential tools and materials for polymer clay art. Discover the must-have items for crafting with this versatile medium, perfect for artists at every level of their creative exploration Introduction to Essential Polymer Clay Tools Welcome to the indispensable toolkit for every polymer clay artist. Whether you’re just beginning your journey into the realm of polymer clay or you’re looking to refine your craft with more advanced techniques, understanding and gathering the right tools is the first step toward bringing your creative visions to life. This guide outlines the essential tools that form the backbone of any polymer clay artist's toolkit, from the basics to more specialized instruments designed to elevate your art Starting with Polymer Clay: The Basics Before diving into the vast array of tools available, it’s important to understand the core materials and equipment that will set the foundation for your work with polymer clay. Work Surfaces: Setting the Stage Non-Stick Work Surfaces A dedicated, smooth, non-stick surface is crucial for conditioning, rolling, and shaping your polymer clay. Options include glass cutting boards, ceramic tiles, or specifically designed non-stick mats. These surfaces not only provide an ideal environment for working with clay but also simplify cleanup and prevent unwanted textures from transferring to your creations. Rolling Tools: The Key to Uniformity Acrylic Rollers and Pasta Machines While a simple acrylic roller is sufficient for many projects, a pasta machine is an invaluable tool for conditioning clay and achieving uniform sheets. The consistent thickness provided by a pasta machine is especially crucial for techniques like millefiori or Skinner blends, where precise control over the clay’s thickness is necessary. Cutting and Shaping Implements Blades, Needles, and Cutters Precision is key in polymer clay art, making sharp blades, needles, and various cutters fundamental tools for any artist. Flexible blades allow for smooth slicing of canes and patterns, while rigid blades are ideal for precise cuts. Needle tools are invaluable for adding fine details, and an assortment of cutters can be used to achieve consistent shapes. Advancing Your Craft: Conditioning and Detailing To truly bring your polymer clay projects to life, the right tools for conditioning, texturing, and detailing are essential. Conditioning Beyond the Basics Motorized Pasta Machines and Clay Conditioners For artists working with larger volumes of clay or seeking to reduce manual labor, motorized pasta machines and dedicated clay conditioners are excellent investments. These devices significantly streamline the conditioning process, ensuring your clay is consistently pliable and ready for any project. Detailing Tools for Intricate Art Sculpting Toolsets and Texture Sheets A comprehensive set of sculpting tools, including ball tools, rubber-tip shapers, and dental tools, opens up a world of possibilities for adding intricate details to your work. Texture sheets and stamps, available in countless designs, offer a straightforward way to add surface detail and depth to your creations, making each piece uniquely your own.Molding and Shaping: From Simple Forms to Complex StructuresMastering the art of molding and shaping polymer clay is a journey, with each tool offering new avenues for creativity. Silicone Molds: Instant Intricacy The Versatility of Molds Silicone molds are a game-changer for creating detailed designs with ease. Suitable for everything from jewelry components to miniature figurines, molds can dramatically reduce the time and skill required to produce intricate pieces. Moreover, they can be used to replicate your favorite shapes consistently, ensuring uniformity across projects. Extruders: Precision and Uniformity The Mechanics of Extrusion For creating uniform ropes, patterns, and embellishments, a clay extruder is an indispensable tool. With various disc shapes available, extruders allow for the creation of precise, consistent shapes that can be used for borders, filigree, and more. Whether manual or powered, an extruder is a valuable addition to your toolkit for adding professional finishes to your work. Baking and Curing: The Final Transformation The transition from pliable clay to a hardened, durable piece is a critical part of the polymer clay art process, requiring both patience and precision. Ovens and Thermometers: Ensuring Perfect Cures Dedicated Polymer Clay Ovens While many artists start with their home oven, a dedicated polymer clay oven offers greater control over the curing process, helping to avoid the pitfalls of uneven temperatures or accidental burning. An oven thermometer is an essential tool in any setup, ensuring that your creations are cured at the correct temperature for the optimal time. In crafting with polymer clay, the right tools not only make the creative process more enjoyable but also elevate the quality of your finished pieces. From the basics of conditioning and shaping to the intricate details that give your work character, each tool in your arsenal plays a crucial role in bringing your artistic visions to life. At Balwin Studios, we're committed to supporting artists at every stage of their polymer clay journey. Our curated selection of polymer clay, tools, and accessories is designed to inspire and facilitate your creativity. Whether you're exploring new techniques or perfecting your craft, Balwin Studios is your partner in creativity, offering everything you need to create with confidence and style. Advanced Techniques and Specialized ToolsExploring advanced techniques in polymer clay art requires a nuanced understanding of the medium and the specialized tools designed to facilitate these techniques. From achieving ultra-fine detail to incorporating mixed media, mastering these tools can transform your approach to polymer clay art. Silicone Tip Tools for Delicate Sculpting Precision at Your Fingertips Silicone tip tools, often found in varying shapes and sizes, are essential for adding minute details to your work. They're perfect for smoothing, shaping, and sculpting without leaving fingerprints, which is crucial for achieving a professional finish on figurines, jewelry, and miniature items. Armature Wire and Support Materials Building Strength From Within For sculptures and figures, armature wire provides an internal support structure to maintain the integrity of your piece. Combined with aluminum foil or other lightweight materials to bulk out shapes, these supports allow you to create larger, more complex pieces without excessive use of clay. Liquid Polymer Clay: A Versatile Medium Beyond Solid Forms Liquid polymer clay opens up a realm of possibilities, from creating thin, flexible finishes to serving as an adhesive or grout for mosaic projects. It can also be tinted with pigments or mixed with solid clay to create unique effects, such as water scenes or translucent details. Finishing Techniques: Elevating Your ArtThe completion of a polymer clay piece involves several finishing techniques that enhance its durability, appearance, and feel. Understanding and applying these techniques properly can significantly impact the overall quality of your artwork. Sanding Tools for a Flawless Finish Achieving Smoothness and Clarity Wet/dry sandpaper in a range of grits, from coarse to ultra-fine, is used to sand your baked pieces. This step is crucial for removing imperfections and preparing the surface for polishing or painting. For those looking for efficiency, sanding sponges and motorized sanding tools can expedite the process. Buffing and Polishing for Luster Bringing Out the Shine After sanding, buffing your piece either manually with a muslin cloth or using a bench buffer brings out a natural shine in the clay. Polishing compounds or automotive waxes can be applied for an extra glossy finish, making your piece stand out. Sealants for Protection Preserving Your Work Choosing the right sealant—be it water-based varnishes, resin coatings, or spray sealants—protects your work from wear and fading. Consider the end use of your piece (e.g., decorative vs. wearable art) when selecting a sealant to ensure it provides adequate protection without compromising the clay’s appearance or texture. Tool Maintenance and CareMaintaining your polymer clay tools ensures their longevity and effectiveness. Regular care not only preserves their condition but also keeps them ready for your next project. Cleaning Your Tools Keeping Your Tools in Top Shape Clean tools are crucial for preventing cross-contamination of colors and maintaining precision in your work. Simple practices, such as wiping blades with alcohol wipes and washing silicone tools with soap and water, can significantly extend the life of your tools. Storage Solutions for Longevity Organizing for Efficiency and Preservation Proper storage not only keeps your workspace organized but also protects your tools from damage. Magnetic strips for metal tools, dedicated containers for small items like cutters and stamps, and clear drawer units for easy visibility can all help maintain the quality of your tools over time. Staying Inspired and InnovativeContinual learning and experimentation are key to keeping your polymer clay art fresh and engaging. Seeking new sources of inspiration and challenging yourself with complex projects can lead to significant growth as an artist. Exploring Advanced Workshops and Courses Lifelong Learning in Polymer Clay Art Participating in advanced workshops and courses, both online and in-person, can introduce you to novel techniques and materials. Learning from experienced artists not only enhances your skills but also expands your creative vision. Joining Polymer Clay Communities Finding Your Tribe Online forums, social media groups, and local clubs offer invaluable opportunities to connect with other polymer clay artists. Sharing your work, seeking feedback, and participating in challenges and swaps can inspire new ideas and refine your techniques. Balwin Studios: Empowering Your Polymer Clay Journey At Balwin Studios, we believe in the transformative power of the right tools and the magic of creativity. Our curated selection of polymer clay, specialized tools, and finishing materials is designed to support artists at every level of their journey. From beginners to seasoned professionals, we provide the essentials and beyond to help you bring your imaginative designs to life. Whether you're looking to explore new techniques, find inspiration for your next project, or simply stock up on your favorite supplies, Balwin Studios is your destination. Our commitment to quality and innovation ensures that every artist can create with confidence and achieve stunning results. Join us as we continue to explore the boundless possibilities of polymer clay art, supporting your creative endeavors every step of the way.
Top 100 Epoxy Resin Art FAQs – Exploring Resin Art

Blog

Top 100 Epoxy Resin Art FAQs – Exploring Resin Art

by My Store Admin on Nov 18 2024
General Questions about Resin Art Products: Understanding the Craft Introduction "Demystifying the World of Resin Art"Resin art, a captivating and versatile medium, has garnered immense popularity. This guide addresses common questions about resin art, offering insights into its creation, materials, and the endless possibilities it presents. General Questions about Resin Art Products What is resin art?Resin art is a form of artwork where artists use epoxy resin, a type of synthetic polymer, to create glossy, hard, and visually appealing pieces. How is resin art made?Resin art is made by mixing epoxy resin with a hardener, then pouring it onto a surface or into molds, often adding colors or objects before it cures and hardens. What materials are used in resin art?Key materials include epoxy resin, hardener, colorants (like pigments or dyes), and various embellishments like glitter, flowers, or beads. How durable are resin art products?Resin art products are highly durable, resistant to moisture and wear, making them long-lasting with proper care. Can resin art be customized?Absolutely, resin art is highly customizable in terms of shape, color, and inclusions, making each piece unique. What are the most popular resin art products?Popular items include resin jewelry, coasters, trays, wall art, and functional decor pieces. How do I care for my resin art product?Keep it out of direct sunlight, clean with a soft cloth, and avoid harsh chemicals to maintain its shine and prevent yellowing. Are resin art products safe for children?While finished products are generally safe, the creation process involves chemicals that should be handled by adults or under strict supervision. Can resin art be used outdoors?Yes, but it's important to use UV-resistant resin to prevent yellowing and degradation from sunlight. How long does resin art last?With proper care, resin art can last for decades, retaining its clarity and luster. Understanding Resin Art Basics What is the difference between epoxy resin and polyester resin?Epoxy resin is more durable, less toxic, and cures clearer than polyester resin, making it preferred for art. How does resin art differ from other art forms?Resin art stands out for its depth, glossiness, and three-dimensional feel, unlike flat, matte finishes in traditional painting. What is the history and origin of resin art?Resin art has roots in industrial applications, evolving into an artistic medium in the late 20th century. Can resin art be considered fine art?Yes, resin art is increasingly recognized in the fine art world for its versatility and unique aesthetic. What are the environmental impacts of resin art?The production and disposal of synthetic resins can be environmentally taxing, prompting a shift towards eco-friendly alternatives. Getting Started with Resin Art What is the best resin art kit for beginners?Look for kits with clear instructions, safety gear, and a variety of basic materials for experimentation. How much does it typically cost to start resin art?Initial costs vary, but a basic setup including resin, hardener, and basic colorants can start from $50-$100. What are the basic steps in creating a resin art piece?Basic steps include preparing your workspace, mixing resin and hardener, adding colors or inclusions, pouring the resin, and allowing it to cure. Are there any common mistakes beginners should avoid in resin art?Common mistakes include incorrect resin-to-hardener ratios, inadequate mixing, and working in an improperly ventilated area. How can I set up a safe workspace for resin art at home?Ensure good ventilation, use protective gear like gloves and masks, and cover surfaces to protect from spills. Advanced Techniques and Design Ideas How do I incorporate objects or colors into resin art?Objects or colors can be added after the resin is mixed but before it cures, allowing for creative layering and design. What are some advanced techniques for texture in resin art?Techniques include using heat guns for wave effects, embedding different materials, and layering for a 3D effect. Can I create large-scale resin art pieces?Yes, but it requires careful planning, larger quantities of resin, and sometimes a more gradual, layered approach to curing. How do I achieve a high-gloss finish on my resin art?Use high-quality resin, ensure a dust-free environment while curing, and consider a top coat for extra gloss. What are some creative uses of resin in art beyond traditional forms?Creative uses include encapsulating objects, creating resin geodes, and combining resin with other mediums like wood or metal. Resin Art for Home Decor How can resin art enhance home decor?Resin art adds a modern, sleek touch to home decor, with its glossy finish and versatility in color and form. What are some popular resin art designs for home use?Popular designs include ocean-inspired pieces, floral embedments, and abstract color patterns. Can resin art be used in functional home items like furniture?Yes, resin is often used in tables, countertops, and decorative yet functional items like trays and bowls. How do I match resin art with my home's aesthetic?Consider the color scheme and style of your space; resin art can be customized to complement modern, rustic, or eclectic decor. What are the care and maintenance tips for resin art in home decor?Avoid direct sunlight, use a soft cloth for cleaning, and avoid extreme temperatures to maintain the integrity of the resin. Resin Art as a Hobby or Business How can I turn my resin art hobby into a business?Start by creating a portfolio, setting up an online store, and networking on social media platforms to reach potential customers. What are the key trends in the resin art market?Current trends include eco-friendly resins, incorporation of natural elements, and personalized, custom designs. How do I price my resin art products?Consider material costs, time, skill level, and market demand. Pricing should cover costs and reflect the artistic value. What are the best platforms to sell resin art online?Popular platforms include Etsy, Instagram, and personal websites with e-commerce capabilities. How can I market my resin art effectively?Utilize social media, collaborate with influencers, participate in art fairs, and consider SEO strategies for online visibility. Workshops and Learning Resources What should I look for in a resin art workshop?Look for experienced instructors, comprehensive material coverage, and hands-on opportunities to practice techniques. How can online tutorials help in learning resin art?Online tutorials offer step-by-step guidance, tips, and can be a great resource for learning at your own pace. Are there any books or magazines dedicated to resin art?Yes, there are several publications and books that focus on resin art techniques and inspiration. How can I connect with other resin artists for learning and inspiration?Join online forums, social media groups, and attend art fairs or workshops to connect with the resin art community. What are some challenges in teaching resin art?Challenges include ensuring safety, managing the varying pace of learners, and conveying complex techniques simply. Health and Safety in Resin Art What are the health risks associated with resin, and how can I mitigate them?Risks include skin irritation and fumes. Mitigate by working in a well-ventilated area, wearing protective gear, and following product guidelines. Are there any non-toxic alternatives to traditional resin?Yes, there are eco-friendly resins available that are formulated to be less toxic and more environmentally friendly. How important is ventilation when working with resin?Proper ventilation is crucial to avoid inhaling toxic fumes and to ensure a safe working environment. What safety gear should I use while working with resin?Use gloves, respirator masks, and protective eyewear, especially when sanding or heating resin. How do I safely dispose of resin waste?Follow local regulations for hazardous waste disposal, and avoid pouring uncured resin into drains or natural environments. Resin Art for Different Audiences Is resin art suitable for children's projects?While the final products are safe, the creation process with chemicals is not recommended for young children. How can I make resin art accessible for beginners?Offer beginner-friendly workshops, create simple project kits, and provide clear instructions and support. Are there any resin art projects specifically for seniors?Yes, projects like small jewelry pieces or coasters can be suitable and enjoyable for seniors. How can resin art be used in educational settings?Resin art can be incorporated into art education to teach about chemistry, color theory, and creativity. What are some simple resin art projects for first-time artists?Start with small projects like pendants, keychains, or simple coasters to learn the basics. Advanced Resin Art Techniques How can I create a marbled effect in resin art?Use multiple colored resins and gently swirl them together before the resin starts to cure. What techniques are used for creating depth in resin art?Layering multiple pours of resin, each with different elements or colors, creates depth and a 3D effect. Can I mix other media with resin in my art projects?Absolutely, mixing media like acrylic paints, alcohol inks, or embedding objects can enhance the creativity of resin art. What are some tips for achieving a flawless surface in resin art?Work in a dust-free environment, use a torch or heat gun to remove bubbles, and ensure your working surface is level. How do I prevent resin art from yellowing over time?Use UV-resistant resin, avoid prolonged exposure to sunlight, and apply a UV-protective varnish if needed. Creative and Artistic Aspects of Resin Art How can I express my artistic style through resin art?Experiment with colors, patterns, and inclusions that reflect your personal style and artistic vision. What are some unique themes to explore in resin art?Consider themes like nature, abstract patterns, celestial bodies, or cultural motifs. How can resin art be used in mixed media projects?Resin can be combined with wood, metal, fabric, or found objects to create multidimensional mixed media art. Can I use resin art in wearable art pieces?Yes, resin is popular in creating unique jewelry pieces like pendants, earrings, and bracelets. What are some ways to add texture to resin art?Techniques include adding textured materials, using molds with patterns, or manipulating resin with tools while it's curing. Technical Aspects and Troubleshooting What causes bubbles in resin and how can I avoid them?Bubbles can be caused by vigorous mixing or moisture. Avoid them by mixing slowly and using a heat gun after pouring. How do I fix imperfections in cured resin art?Sand the area gently and apply a fresh layer of resin for minor imperfections. For larger issues, you may need to pour a new layer. What is the ideal curing time and temperature for resin art?Curing time varies by product but typically ranges from 24 to 72 hours. Ideal temperatures are between 75-85°F (24-29°C). Can I speed up the resin curing process?While some resins can be cured faster with heat, it's generally recommended to follow the manufacturer's curing time for best results. How do I ensure even coloring in my resin art?Mix colorants thoroughly with resin before pouring and use high-quality pigments for consistent color. Resin Art in Professional and Commercial Contexts How can I showcase my resin art in galleries or exhibitions?Create a compelling artist statement, ensure high-quality finishing of your pieces, and consider unique themes or styles that set your work apart. What are the best practices for shipping resin art?Use sturdy, protective packaging, consider insurance for high-value pieces, and provide clear handling instructions to ensure safe delivery. How can I effectively price my resin art for galleries or commercial sale?Factor in material costs, time, artistic value, and market research. Pricing should reflect the quality and uniqueness of your work. What are some strategies for building a brand around my resin art?Develop a consistent style, create a strong online presence, engage with your audience, and offer a range of products. How do I handle commissions and custom requests for resin art?Communicate clearly with clients about expectations, timelines, and pricing. Create sketches or prototypes for approval before starting the final piece. What are the legal considerations for selling resin art?Understand copyright and intellectual property laws, have clear terms of sale, and consider business licensing and tax implications. Environmental and Ethical Considerations Are there sustainable practices in resin art production?Use eco-friendly resins, minimize waste, and consider the lifecycle and disposability of your art products. How can I source ethically-produced resin and materials?Research suppliers committed to environmental responsibility, and consider using recycled or biodegradable materials. What are the challenges of making resin art eco-friendly?Finding non-toxic, biodegradable resins that perform as well as traditional resins can be challenging. Can resin art be recycled or repurposed?While difficult to recycle traditionally, resin art can be repurposed or upcycled into new art pieces. How do I educate customers about the environmental impact of resin art?Provide information about the materials used, offer tips for long-term care, and promote sustainable art practices. Community and Collaboration How can I collaborate with other artists or brands in resin art?Reach out for joint projects, participate in collaborative exhibitions, or create cross-promotional art pieces. What are some ways to engage with the resin art community?Join online forums, attend workshops and art fairs, and participate in community projects or challenges. How can resin artists contribute to local art scenes?Offer workshops, collaborate with local businesses for art installations, and participate in community art events. What are the benefits of joining resin art associations or groups?Networking opportunities, access to resources and information, and a sense of community and support. Can resin art be used for social or charitable causes?Yes, artists can create pieces for auctions, fundraisers, or awareness campaigns, using art to support meaningful causes. Trends and Future of Resin Art What are the emerging trends in resin art?Trends include the use of natural elements, exploration of 3D printing with resin, and interactive, sensory art pieces. How is technology influencing resin art?Digital tools for design, social media for marketing, and online platforms for sales are significantly impacting the resin art world. What is the potential future of resin art in the art world?Resin art is gaining recognition for its versatility and potential for innovation, suggesting a growing presence in contemporary art. How can resin artists stay updated on industry changes and trends?Follow art blogs, subscribe to industry magazines, and engage with online communities. What role does resin art play in modern interior design?Resin art offers unique, customizable options for modern interiors, blending functionality with artistic expression. Personal Development and Artistic Growth How can I continuously improve my skills in resin art?Practice regularly, experiment with new techniques, and seek feedback from peers or mentors. What are some goals resin artists can set for their development?Goals can include mastering advanced techniques, developing a signature style, or exhibiting in prestigious galleries. How can resin art be a tool for personal expression?Resin art allows for personal storytelling, emotional expression, and exploring individual creativity. What are the therapeutic benefits of engaging in resin art?It offers stress relief, a sense of accomplishment, and can be a meditative and therapeutic practice. How can I find my unique voice or style in resin art?Explore different mediums and techniques, draw inspiration from personal experiences, and don't be afraid to break traditional rules. Education and Teaching Resin Art What are effective ways to teach resin art to beginners?Start with basic techniques, provide comprehensive step-by-step instructions, and create a supportive learning environment. How can I develop a curriculum for resin art classes?Structure classes around skill progression, include both theory and practical exercises, and tailor content to your audience's needs. What are the key elements of a successful resin art workshop?Clear objectives, hands-on practice, quality materials, and an engaging and knowledgeable instructor. How can online platforms be used for teaching resin art?Utilize video tutorials, live webinars, and interactive online classes to reach a wider audience. What are some challenges in online resin art education?Ensuring students have access to materials, providing personalized feedback, and creating an interactive learning experience remotely. How can I assess the progress of students in resin art?Through project submissions, constructive feedback sessions, and observing improvements in technique and creativity. What are the opportunities for professional development in teaching resin art?Attend educator workshops, obtain certifications, and stay updated with industry trends to enhance teaching skills and knowledge. Conclusion Resin art offers a world of creative possibilities, blending artistic expression with technical skill. Whether you're a beginner or an experienced artist, understanding the nuances of resin art can lead to stunning creations that stand the test of time.
The Ultimate Beginner’s Guide to Polymer Clay Art

Blog

The Ultimate Beginner’s Guide to Polymer Clay Art

by My Store Admin on Nov 18 2024
Embark on a journey of creativity with our comprehensive beginner's guide to polymer clay. Discover the joy of crafting with tips on materials, techniques, and projects perfect for starting your exploration into this colorful world Introduction to Polymer Clay Art Welcome to the vibrant and endlessly creative world of polymer clay art, a medium that captivates with its versatility and the boundless opportunities it offers for artistic expression. Whether you're drawn to crafting intricate jewelry, whimsical figurines, or unique home décor, polymer clay is a medium that promises not only the freedom to bring any idea to life but also the joy of seeing your visions become tangible creations. This guide aims to lay down the foundation for your journey into polymer clay art, from understanding what polymer clay is to guiding you through your first projects. What is Polymer Clay? At its core, polymer clay is a type of modeling clay based on the polymer polyvinyl chloride (PVC), which hardens when baked in a conventional oven. Unlike air-dry clays, it remains pliable until cured, offering artists and hobbyists the flexibility to perfect their pieces over time. Available in a rainbow of colors, polymer clay can be mixed, conditioned, shaped, and eventually hardened to create durable and vibrant artworks. Choosing the Right Type of Polymer Clay Navigating the array of polymer clay brands and types can be overwhelming for beginners. Key brands include Sculpey, Fimo, and Kato, each offering products with unique properties suited for different applications. For those just starting, Sculpey Premo stands out for its excellent balance of firmness and pliability, making it both easy to work with and durable after baking. The Color Spectrum Polymer clay's extensive color palette is one of its most appealing features. From translucent and metallic finishes to glow-in-the-dark hues, the potential to create pieces that match your artistic vision is limitless. Learning to mix colors is a skill that will greatly enhance the uniqueness of your projects, allowing you to achieve the perfect shade or gradient. Essential Tools for Polymer Clay Art Crafting with polymer clay requires more than just your hands and imagination. Assembling a toolkit with essential items will make the creative process smoother and more enjoyable. Basic Toolkit Essentials - Polymer Clay Art Work Surface: A smooth, non-porous surface is ideal for rolling and shaping clay. Rolling Pin or Pasta Machine: Essential for conditioning clay and creating uniform sheets. Blades and Cutters: Precision tools for cutting and shaping your designs. Oven: A conventional home oven is used for curing (baking) the clay to harden it. Advanced Tools As you grow more comfortable with basic projects, you may wish to explore tools that add texture and detail, such as: Texture Sheets: To imprint patterns onto your clay. Molds: Silicone molds can be used for creating consistent shapes or intricate designs. Extruders: Useful for creating long, uniform strands of clay. Conditioning and Molding Your Polymer Clay The Art of Conditioning Conditioning is the process of preparing polymer clay for use, making it more pliable and easier to shape. This is done by kneading the clay with your hands or running it through a pasta machine. Properly conditioned clay should be soft and smooth, without any cracks or crumbles. Molding Techniques Shaping polymer clay can be as simple as hand-forming basic shapes or as complex as using molds and tools to achieve detailed sculptures. Beginners should start with simple projects to get a feel for the material, gradually moving on to more advanced techniques as their confidence and skills develop. Baking Your Polymer Clay Creations Curing polymer clay in an oven is the final step in bringing your project to life. It's a critical process that transforms the clay from a malleable state to a hardened, durable finish. Oven-Bake Instructions Temperature and Time: Baking temperatures and times vary by clay type, but a general guideline is to bake at 265°F (130°C) for 15-30 minutes per 1/4 inch of thickness. Monitoring the Process: Using an oven thermometer is advisable to ensure the temperature is accurate, preventing the clay from burning or not curing properly. Embarking on Your First Projects Starting with simple projects can help build your confidence and skills in working with polymer clay. Consider projects like basic beads, pendants, or small figurines, which provide a solid foundation in shaping and baking techniques. Project Ideas for Beginners Beaded Jewellery: Crafting your own beads for necklaces or bracelets. Decorative Knobs: Creating custom knobs for cabinets or drawers. Miniature Plants: Sculpting tiny plants or flowers for dollhouses or decor. As you embark on your polymer clay journey, remember that patience and practice are your best allies. Each piece you create will bring new insights and ideas, helping you grow as an artist. At Balwin Studios, we're here to support your creative exploration, offering a wide range of polymer clay supplies and inspirations. Dive into the world of polymer clay art with us and discover the endless possibilities of this fascinating medium. Advanced Techniques in Polymer Clay Art As your skills and confidence grow, diving into advanced polymer clay techniques can further expand your creative possibilities. These methods allow for more intricate designs and can transform simple projects into works of art. Blending and Gradients Creating smooth color transitions, or gradients, in polymer clay can add a realistic or fantastical element to your pieces. The Skinner Blend, a popular technique among polymer clay artists, involves blending two or more colors to create a seamless gradient, perfect for petals, skies, and abstract designs. Caning for Complex Patterns Caning is a technique borrowed from glasswork that involves creating logs or cylinders of clay with intricate designs that run through the length of the cane. When sliced, each piece reveals the design, which can be used to decorate surfaces or as part of larger sculptures. Mastering the cane technique opens up a world of pattern possibilities. Sculpting Detailed Figurines Sculpting with polymer clay can range from simple models to complex figurines with detailed features. Tools like dental tools, knitting needles, and silicone-tipped sculpting tools can help achieve fine details. Building an armature or skeleton inside larger sculptures ensures stability and realism in poses. Seasonal Projects and Gifts Polymer clay's versatility makes it ideal for creating personalised gifts and seasonal decorations. Whether it's ornaments for Christmas, heart-shaped pendants for Valentine's Day, or decorative eggs for Easter, polymer clay allows you to add a personal touch to any celebration. Custom Ornaments Creating custom ornaments with polymer clay can be a festive project for all ages. Incorporate textures, mica powders, and metallic leaf for a sparkling finish that catches the light on any holiday tree. Personalised Jewellery Polymer clay jewellery can range from simple and elegant to bold and intricate. Design unique pieces that reflect personal style or create bespoke gifts that carry a special meaning. Preserving and Finishing Your Artwork After baking, your polymer clay projects can be finished and preserved with various techniques to enhance their durability and appearance. Sanding and Buffing Sanding your baked polymer clay pieces can remove imperfections and prepare the surface for buffing. Buffing, either by hand or with a machine, brings a smooth, glossy finish to the clay, elevating the final appearance. Varnishing and Sealing Applying a varnish or sealant can protect your polymer clay projects from wear and tear, make colors more vibrant, and add a matte or gloss finish according to your preference. Joining the Polymer Clay Community Engaging with the polymer clay community can provide inspiration, support, and opportunities to learn new techniques. Online forums, social media groups, and workshops are great places to connect with fellow enthusiasts and share your creations. Workshops and Classes Consider participating in workshops and classes to improve your skills. These sessions can provide hands-on experience with new techniques and offer the chance to ask questions and receive feedback in a supportive environment. Balwin Studios: Your Partner in Creativity At Balwin Studios, we understand the passion and dedication that goes into every polymer clay project. Our curated selection of high-quality polymer clay, tools, and accessories is designed to support artists at every stage of their creative journey. Expanding Your Toolkit with Balwin Studios Explore our extensive range of polymer clay brands, including Sculpey, Fimo, and Kato, to find the perfect match for your project. Our selection of specialized tools, from sculpting sets to texture sheets and pasta machines, can help you refine your technique and bring your visions to life. Learn and Grow with Balwin Studios Workshops We're proud to offer workshops and classes led by experienced polymer clay artists. These sessions cater to various skill levels, from beginners looking to learn the basics to advanced artists seeking to master new techniques. Our workshops provide a welcoming space to explore your creativity, learn from experts, and connect with a community of like-minded individuals. Explore Our Blog for Inspiration and Guidance At Balwin Studios, we believe in the power of sharing knowledge and inspiration. Our blog is a treasure trove of resources for polymer clay enthusiasts of all levels. Whether you're looking for your next project idea or need detailed guidance on a new technique, our blog posts are designed to inspire and inform. At Balwin Studios, we're more than just a supplier; we're a community of artists, creators, and dreamers. Whether you're just starting your polymer clay journey or looking to push the boundaries of your craft, we're here to support, inspire, and celebrate your artistic endeavours.